Welcome to my New Blog!
Published May 1, 2023This is an entirely new website built from the ground-up using many of the bleeding-edge features from Next.js and Vercel. In this post I'm going to dive into how it's built!
Features Leveraged
- Next.js App Directory
- Next.js Image Component
- Next.js OG Image
- Vercel Edge Config
- Next.js Intercepted Routes
- Next.js Parallel Routes
- CSS Modules
- MDX Rendering
Next.js App Directory
Everything you see here is built using the (still in beta) Next.js App directory. This is a new way of routing in Next.js that allows you to have shared layouts between routes, display multiple routes at once, and intercept route changes.
Here's a pared-down version of my app file structure. All I removed are css files and some utilities/components that are not relevant to this post:
.
├── @postModal
│   ├── (...)blog
│   │   └── [slug]
│   │       ├── loading.tsx
│   │       └── page.tsx
│   └── default.ts
├── [shortCode]
│   └── page.tsx
├── blog
│   ├── @modal
│   │   ├── (...)blog
│   │   │   └── [slug]
│   │   │       ├── loading.tsx
│   │   │       ├── page.tsx
│   │   └── default.ts
│   ├── [slug]
│   │   ├── not-found.tsx
│   │   └── page.tsx
│   ├── default.ts
│   ├── layout.tsx
│   ├── page.tsx
│   ├── tag
│   │   └── [tag]
│   │       └── page.tsx
├── layout.tsx
├── library
│   ├── @libraryModal
│   │   ├── (...)library
│   │   │   └── [slug]
│   │   │       ├── loading.tsx
│   │   │       └── page.tsx
│   │   └── default.ts
│   ├── [slug]
│   │   └── page.tsx
│   ├── default.ts
│   ├── layout.tsx
│   └── page.tsx
└── page.tsx
bash
This pattern allows me to do some interesting things that were not previously possible. For example, when switching from the home
page to my blog page, you'll note that the navigation menu/widget animates at the top of the page when transitioning. This is because the
navigation lives in layout.tsx at the top level of my app, and nested pages are rendered inside the layout.
Another powerful pattern you can use with the app directory is URL-based modals. This is how I did the effect on my blog where posts are opened in a slide-up tray, until you perform a hard refresh, at which point they are opened full-screen as a normal page. This is done with a combination of parallel routes and intercepted routes.
Folders that begin with an @, like @modal, become "slots" that can be rendered in their accompanying layout. So, my blog page layout is like this:
export default function BlogLayout({ children, modal }: any) {
  return (
    <>
      {children}
      {modal}
    </>
  );
}
tsx
Everything under the @modal subtree can be rendered after the layout's children! My slide-up modal is a fixed position element that goes
in this modal slot, but you could also use this, for example, to show two routes side-by-side.
The last thing we need to do for the modal behavior is
intercept the route change and render the modal instead of the target page. This is done using intercepted routes. The folders that begin with (...) are
interceptors that can "catch" a route change that matches the rest of the file path. They can be used to render an alternate page when the route transitions to the one that is being intercepted. In this case,
clicking an article from /blog will transition to /blog/[slug], which is intercepted by (...)blog/[slug] and causes the @modal page to be rendered alongside the children.
I can even still return a loading.tsx file from the parallel route, to show a loading indicator if the post page is not yet loaded:
import { faSpinnerThird } from '@keegandonley/pro-solid-svg-icons';
import { FontAwesomeIcon } from '@fortawesome/react-fontawesome';
import styles from './loading.module.css';

export default function BlogModalLoading() {
  return (
    <div className={styles.container}>
      <FontAwesomeIcon icon={faSpinnerThird} spin className={styles.icon} />
    </div>
  );
}
tsx
You'll see this loader occasionally if the server takes a moment to load the post in the modal.
Next.js Image Component
Nothing kills performance of a website like large images, but you'll notice they're pervasive throughout my site and blog. This works thanks to the Next.js Image component, which automatically optimizes images for the device size and screen resolution. It also supports lazy loading and blur-up effects, which I leverage nearly everywhere.
My images are stored in a number of different R2 buckets on Cloudflare, and I automatically build blurred representations of each one. This blur dataUrl as
well as image metadata (like dimensions) are stored in a JSON file that is generated at build time. This allows me to use the <Image /> component effectively,
by passing in dimensions and blur dataUrl for each image. All of the image preprocessing and metadata generation happens in Go. Here's a snippet of how I create
the blurDataUrl:
image, _ := downloadImage(bucketURL + *fileName)
blurred, _ := stackblur.Process(image, 2000)

newImage := resize.Resize(100, 0, blurred, resize.NearestNeighbor)

// Encode the blurred image to JPEG
var buf bytes.Buffer
imgErr := jpeg.Encode(&buf, newImage, &jpeg.Options{Quality: 75})
if imgErr != nil {
  os.Exit(1)
}

// Base64-encode the image data
encoded := base64.StdEncoding.EncodeToString(buf.Bytes())

// Create a data URL with the appropriate MIME type
dataURL := "data:image/jpeg;base64," + encoded
go
Next.js OG Image
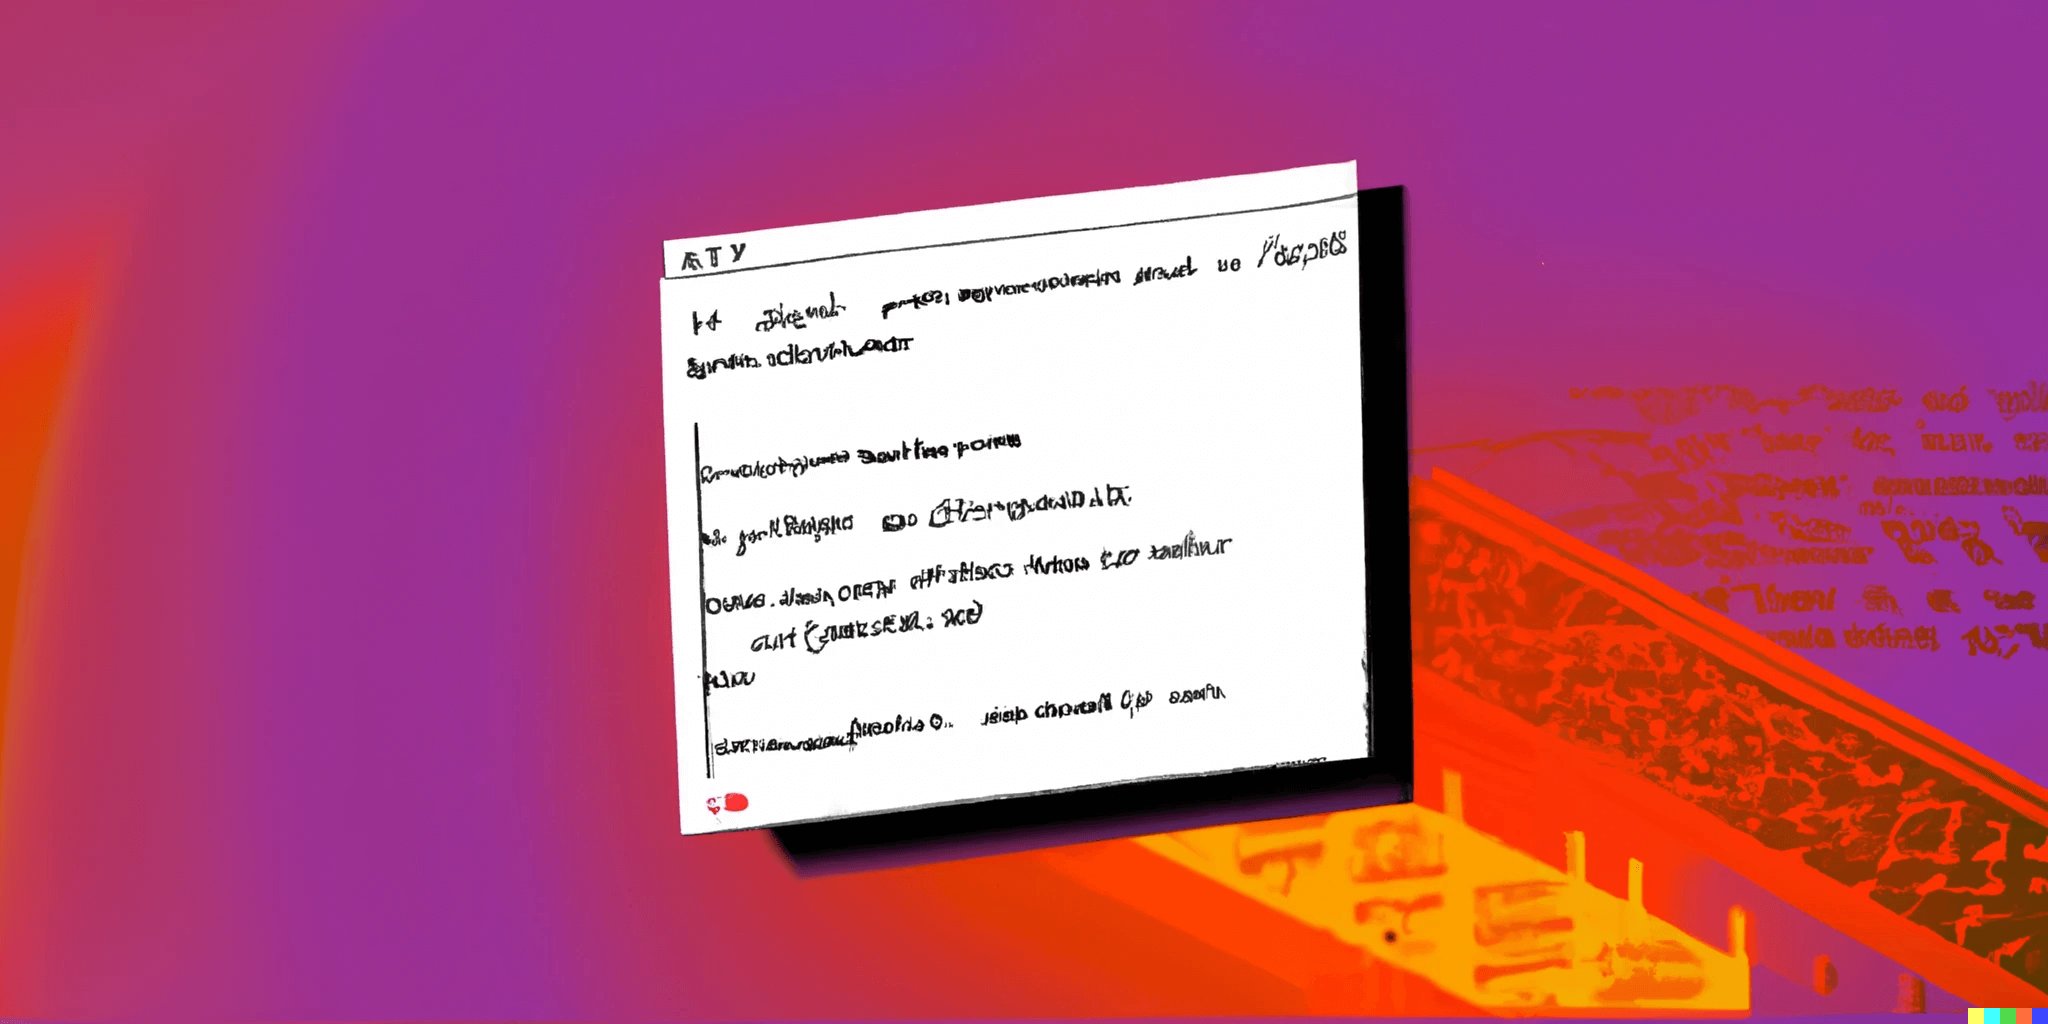
"OG" images, or opengraph images, are the cards you see rendered when sharing a link on social media. I wanted to have custom OG images for each of my blog posts,
but I didn't want to have to manually create them. I also wanted to be able to use the same image for the blog post header itself, and @vercel/og is perfect for this.
Here's the og image for this post:
Here's a super pared down example of my OG handler (see the full handler open-source on my Github if you're curious). Using a subset of CSS, you can build the card using react (and components work too!) and then return it as an image:
export async function GET(request: Request) {
  const { searchParams } = new URL(request.url);
  const found = getComponentForSearchParams(searchParams);

  return new ImageResponse(
    (
      <div
        style={{
          width: '100%',
          height: '100%',
          display: 'flex',
          flexDirection: 'column',
          background: `url(${found.image})`,
        }}
      >
        {found.title}
        {found.description}
      </div>
    ),
    {
      width: found.width,
      height: found.height,
    },
  );
}
tsx
Vercel Edge Config
Vercel edge config is a data store with negligible read latency that can be used to store small amounts of data. I use it to conditionally hide or show a maintenance banner on my site. With edge configs, I can turn it on and off and change the message without having to redeploy my site.
My edge config currently looks like this:
{
  "event": {
    "text": "Currently under construction, but feel free to look around!",
    "active": false
  }
}
json
Reading the config is as simple as:
import { get } from '@vercel/edge-config';

const event = await get('event');

return (
  <html lang="en">
    <body>
      {/* Display banner text from the edge config if an event is active */}
      {event?.active ? <Banner level={1}>{event.text}</Banner> : null}
      {/* remaining content here */}
    </body>
  </html>
);
tsx
Edge configs can also be used as a feature flagging system. I have a different edge config for each environment (local dev, production, and preview deployments), and I can use them to conditionally turn on and off features I'm testing but not quite ready to release.
You are quite limited in the number of edge configs you can have, and the size each config can be, so if you implement this in a large project with lots of flags, you may start hitting the limits early, especially on the hobby plan from Vercel.
MDX Rendering
I use MDX to render my blog posts. MDX is a superset of markdown that allows you to embed React components in your markdown, among other advanced features. In the app directory paradigm of Next.js, MDX rendering is a bit tricker than in the past, but it's still possible.
Rather than MDX files being pages, they're just files in my /posts directory. I then import them into my blog and the route handler
picks the correct one at request time based on the slug.
I have each post in a file, with the main content, and some exports at the top for the metadata:
export const title = "Welcome to my New Blog!";
export const slug = "welcome-to-my-new-blog";
export const cover = "blog-launch-cover.png";
export const description =
"How my new website is built using the latest Next.js app directory, and other bleeding-edge features";
export const published = new Date(2023, 4, 31);

This is an entirely new website built from the ground-up using many of the bleeding-edge features from [Next.js](https://beta.nextjs.org/docs) and [Vercel](https://vercel.com/).
In this post I'm going to dive into how it's built!
markdown
The MDX file can then be imported in blog/[slug]/page.tsx and rendered from there!
const found = getComponentForKey({ key: componentKey });
const Component = found.default;

if (!Component) {
  notFound();
}

const { title, cover, metadata } = found;

return (
  <>
    <div>
      <Image
        src={`${BUCKET_URL}/${cover}`}
        alt="todo"
        fill
        priority
        {...metadata}
      />
    </div>
    <article>
      <h1>{title}</h1>
      <Component />
    </article>
  </>
);
tsx
MDX is great because I can import React components and render them, yielding much more dynamic blog posts than on my old blog. For example, I can render elements like my avatar image:

I plan to use this for more interactive posts in the future, but it's already being leveraged in a few places, like that OG image preview from earlier.
CSS Modules
More importantly, why not tailwind?. I'm a big proponent of Tailwind and use it heavily for projects, especially for ones I need to stand up quickly. However, I knew that I wanted my website to have a unique, and complex design that I felt would require an unweildy number of tailwind classes. I also wanted to be able to keep my CSS skills sharp, and building this website was a great way to do that.
CSS modules, variables, and media queries come together to create a nice design system for my website, even without a CSS framework like Tailwind.
.inner {
  background: var(--theme-background);
  width: var(--main-width);
  max-width: var(--main-max-width);
  margin: 0 auto;
  margin-top: 5rem;
  margin-bottom: 2rem;
  position: relative;
  transform: translateY(100vh);
  transition: transform var(--animation);
  transition-delay: 10ms;
  border-radius: calc(var(--tiny-border-radius) * 2);
  overflow: hidden;
}

@media only screen and (max-width: 700px) {
  .inner {
    width: 100%;
    margin: 0;
    border-radius: 0;
  }
}
css
Conclusion
I hope you enjoyed this dive into how my new website is built! There's a lot to unpack here, and a ton of new features I'd like to dive into more in future posts. I'm really excited about the new features and look, and I'm looking forward to what's to come. If you have any questions, feel free to reach out to me on Twitter or Bluesky!