

Visual Regression Testing with Storybook
Published October 18, 2023I’ve spent a lot of my time lately working on a modern new design system for Kizen, and one of my goals for this new system has been to limit the risk of component regressions as much as possible. Working on a design system with lots of components, and multiple maintainers, means there’s a risk that one change inadvertently breaks another component or piece of the design system. It became important early on that I set up visual regression testing to make sure that one style change doesn’t break any other use-cases.
I've used a similar pattern in other projects in the past and here on my own site, so what I'm going to share here is how I have it set up for my own personal use.
What is Visual Regression Testing?
I've written about testing before including visual tests, but here's a quick recap:
Rather than test that a component behaves correctly, or has the right markup, a visual test actually loads up the component, renders it, and takes a screenshot to compare it to a reference image. These reference images are committed to the repository so any time the test is run, it can compare to the same reference file. Many solutions will show a nice diff and explain how the reference image differs from the actual component in the case of a failure.
Storybook
Like many design systems, this site's system and the one for Kizen are documented and laid out using Storybook. Storybook allows you to write small examples showing different variations of a component, as a form of documentation, and also include code samples of how to use the component. I wanted my visual tests to hook into this system, so if I want to test a particular configuration of a component, all I have to do is write a story, and a test gets created automatically.
This introduces a bit more complexity in the setup, but once it's up and running it's incredibly easy to add a new visual test case.
Let’s look at an example. In this case, I’ll use the “cheers” component you see on the top right of every one of my blog posts:
-- cheers(Go ahead, you can click it here too!)
It all starts with my story file, and a single simple story written using the component story format (CSF).
// Cheers.stories.tsx

import { Meta, StoryObj } from '@storybook/react';
import { Cheers } from './components/Cheers';

const meta: Meta<typeof Cheers> = {
  component: Cheers,
  title: 'Post/Cheers',
  argTypes: {},
};

export default meta;
type Story = StoryObj<typeof Cheers>;

export const Primary: Story = {
  args: {
    count: 30,
    slug: 'text-slug',
    location: 'blog',
  },
};
tsx
Here, I have just one story - Primary. We can easily add a few more:
export const EmptyCount: Story = {
  args: {
    count: 0,
    slug: 'text-slug',
    location: 'blog',
  },
};

export const OverflowValue: Story = {
  args: {
    count: 999999,
    slug: 'text-slug',
    location: 'blog',
  },
};
tsx
When we're finished, all 3 of these stories will be turned into visual regression tests.
Testing Approach
I set up my visual regression tests using Jest and americanexpress/jest-image-snapshot. Here's how it works: the test framework saves a reference image on the first run, and then compares subsequent runs to that reference image in order to determine if any pixels changed. If they did change unexpectedly, the test fails.
There are some other options like setting a threshold of how much change is allowed, but I recommend starting simple and tune it from there if you run into issues.
Here’s my approach for turning stories into tests:
- Parse the story file
- Extract the test names
- Convert the test names to story IDs
- Get the iframe URL to render the story without any of the Storybook UI chrome
- Create a test for each iframe URL
1. Parse the story file
The first thing we need to do is read the story file in, so we can parse it:
const storyContent = fs.readFileSync(
  path.join(__dirname, 'Cheers.stories.tsx'),
  'utf8',
);
typescript
I keep my stories, components, and tests all co-located in a folder:
Cheers
├── Cheers.stories.tsx
├── Cheers.test.ts
└── Cheers.tsxtext
My code examples here assume your directory is laid out something like this
2. Extract the Test Names
Next, we need to parse out each story name, so we can load it in as a test:
const storyExpression = /export\s+const\s+(\w+):\s+Story/g;

const storyNames = [];
let match;

while ((match = storyExpression.exec(storyContent)) !== null) {
  storyNames.push(match[1]);
}
typescript
My stories are written in Typescript, and laid out as you saw in
Cheers.stories.tsxearlier. You will need to modify the regular expression in the parser to match your story file format if it differs from mine.
3. Convert the Test Names to Story IDs
In this case, my story names will be parsed as Primary, EmptyCount and OverflowValue - that’s a good
start, but we need to convert them to story IDs. My story files are using the open-source component
story format (CSF), so I was able to look at the source code and figure out how the story
ids are generated from the names. That code
is open-source on Github
if you want to check it out, but I included a modified version below.
To get the story ids, we just need to modify that a little to match the format:
const ids = storyNames.map((name) => {
  return name
    .replace(/_/g, ' ')
    .replace(/-/g, ' ')
    .replace(/\./g, ' ')
    .replace(/([^\n])([A-Z])([a-z])/g, (str2, $1, $2, $3) => `${$1} ${$2}${$3}`)
    .replace(/([a-z])([A-Z])/g, (str2, $1, $2) => `${$1} ${$2}`)
    .replace(/([a-z])([0-9])/gi, (str2, $1, $2) => `${$1} ${$2}`)
    .replace(/([0-9])([a-z])/gi, (str2, $1, $2) => `${$1} ${$2}`)
    .replace(/(\s|^)(\w)/g, (str2, $1, $2) => `${$1}${$2.toUpperCase()}`)
    .replace(/ +/g, ' ')
    .trim()
    .toLowerCase()
    .replace(/\s/g, '-');
});
typescript
All these replacements and regular expressions should yield a consistent story ID for each story name.
4. Create the Test Using the Derived iFrame URL
Finally, it’s time to spin up a test. This is where we build the iframe URL to navigate to, so that we don't have to see all the storybook UI chrome in our test, and we're only testing our components themselves.
Here's what Storybook looks like for our story out of the box:
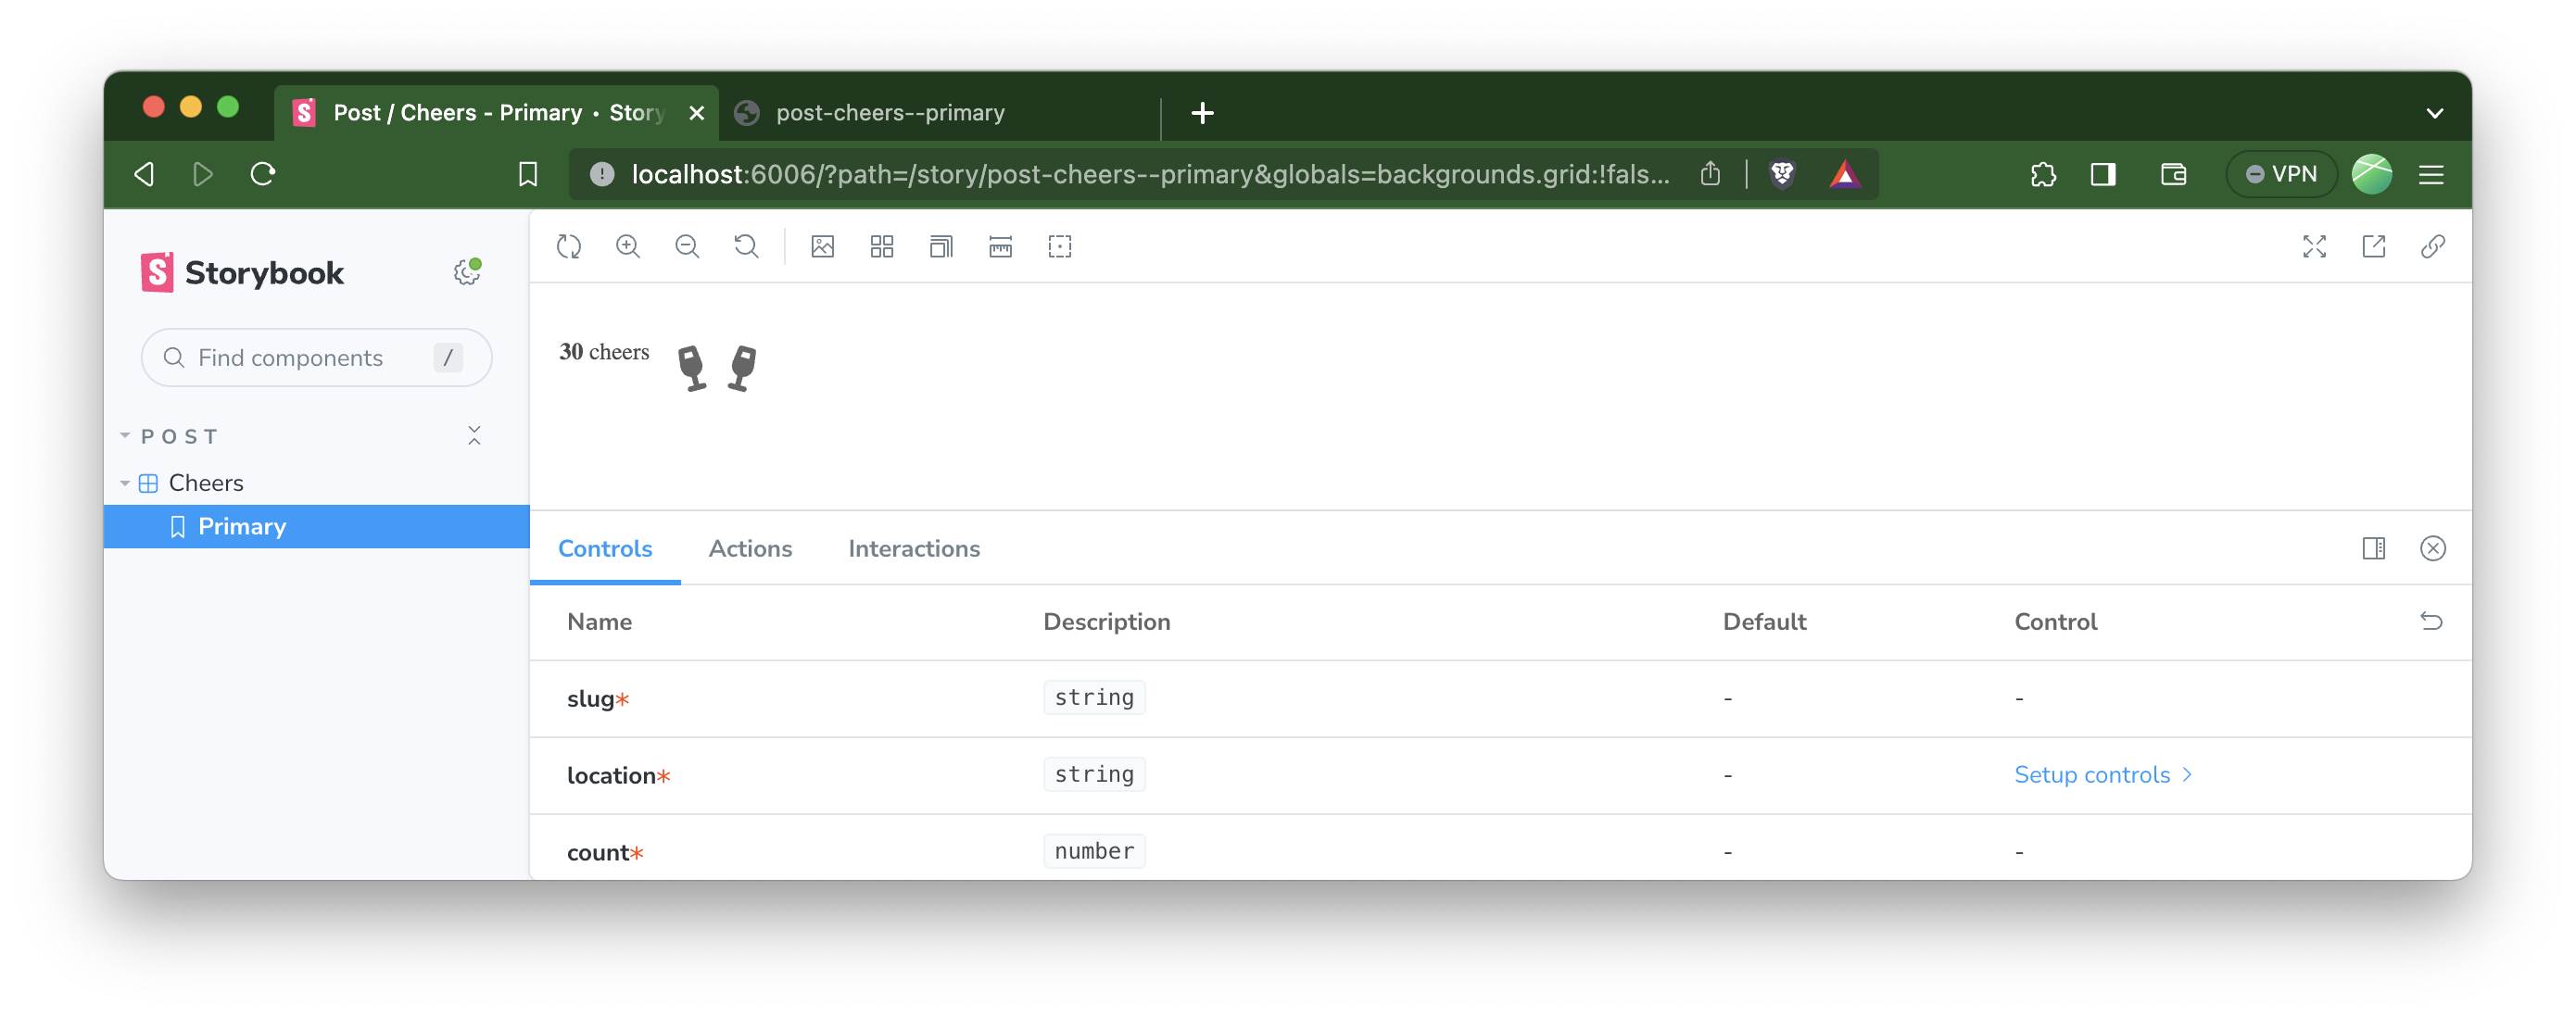
We don't want our tests to include all that Storybook UI, so we build the custom URL to render it like this:
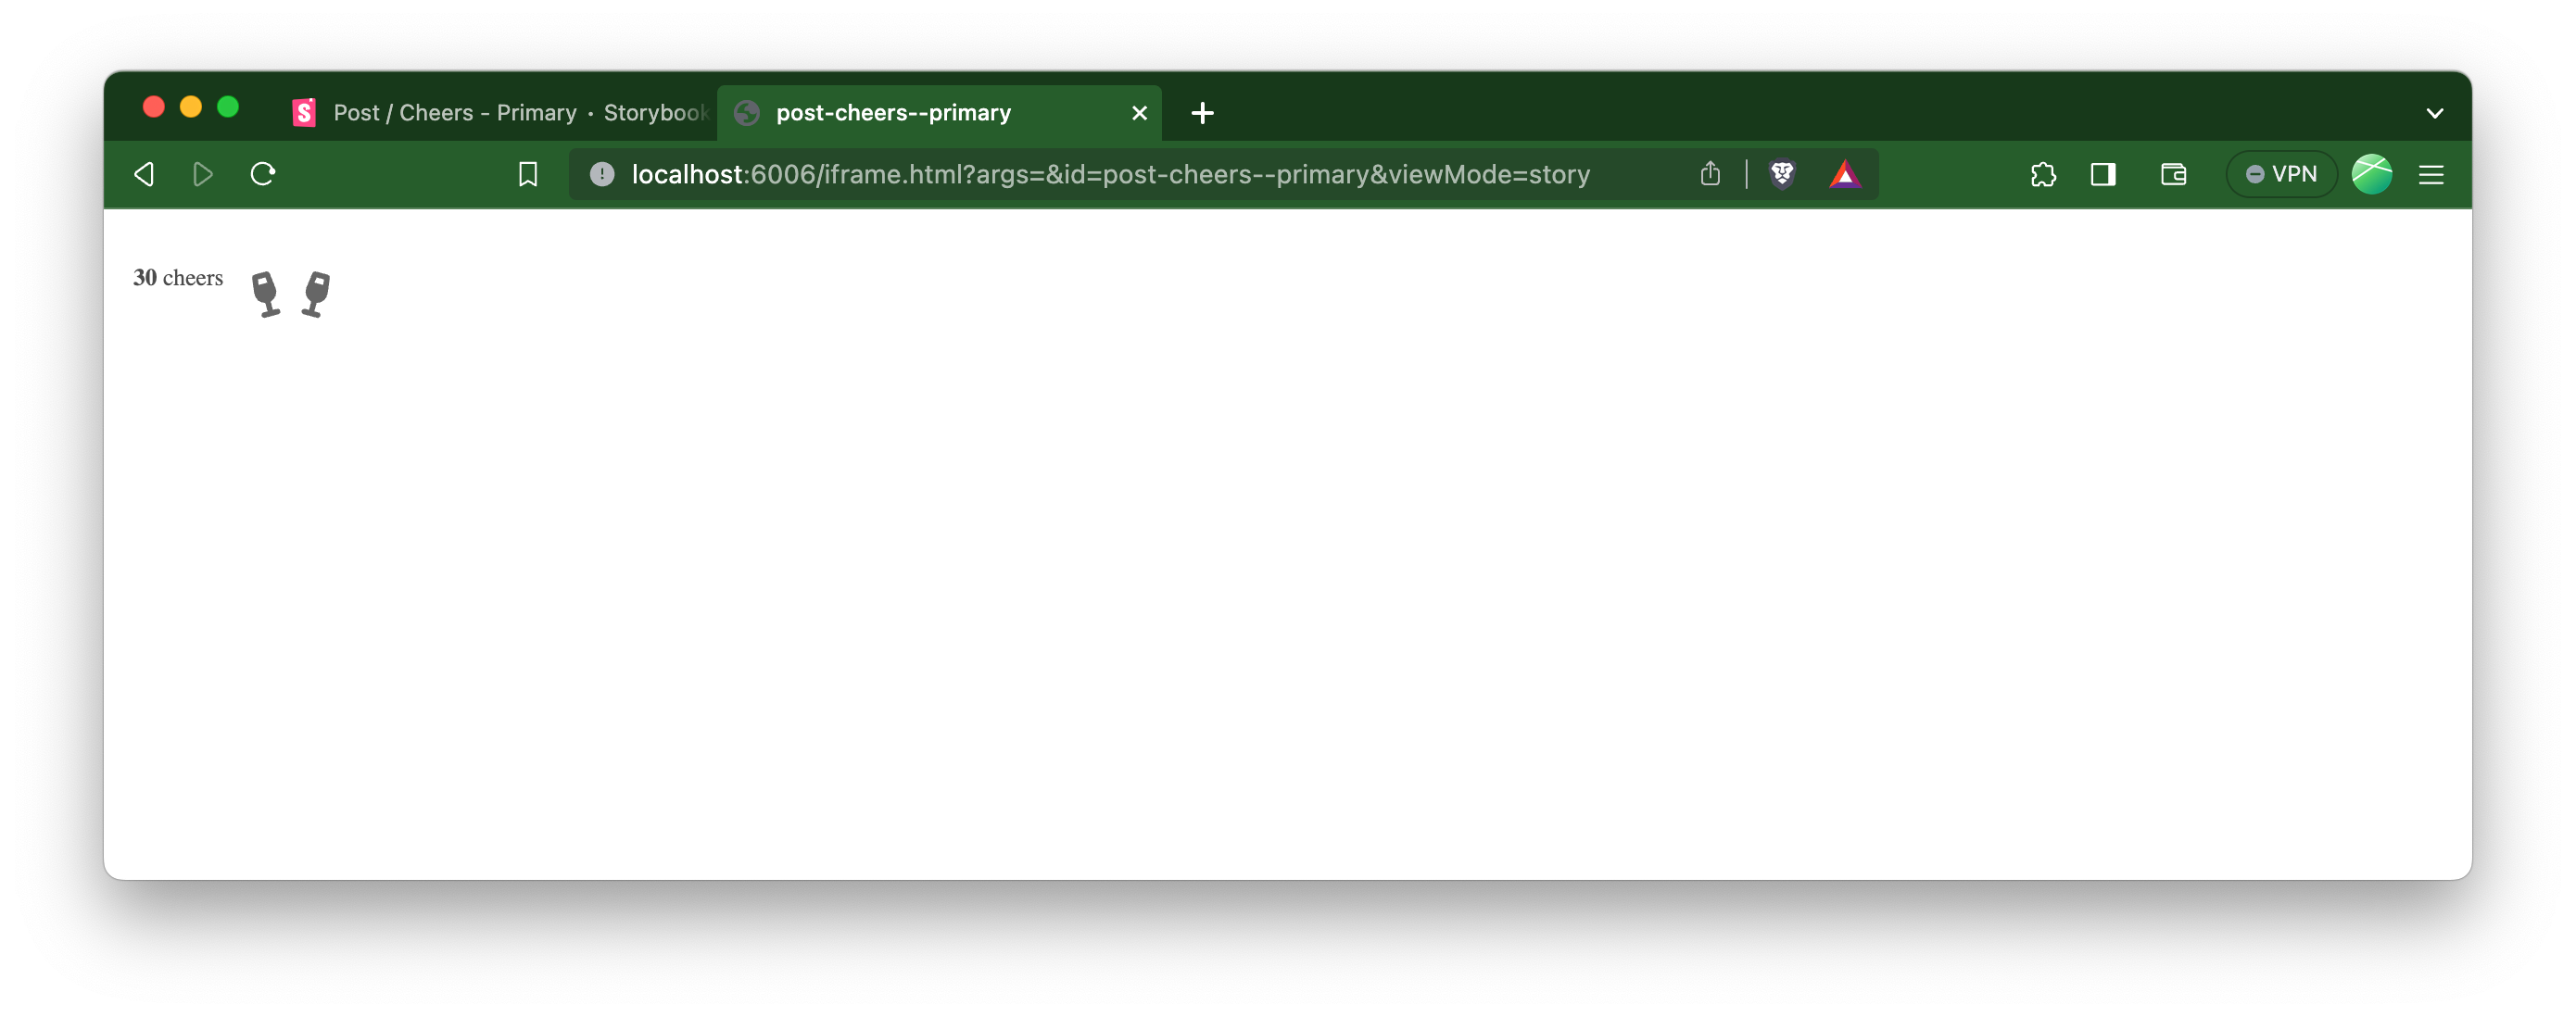
When storybook is running, the following test will navigate directly to our frameless story. I used Puppeteer to do the browsing and screenshotting, but any library that works with Jest that can take a screenshot like this will work.
import { toMatchImageSnapshot } from 'jest-image-snapshot';
import puppeteer from 'puppeteer';

expect.extend({ toMatchImageSnapshot });

describe('Test Cheers Component', () => {
  test.each(ids)('cheers-%s', (id) => {
    // initialize the browser
    const browser = await puppeteer.launch({
      headless: 'new',
      defaultViewport: {
        width: 200,
        height: 200,
      },
    });

    const page = await browser.newPage();

    // navigate to our story, in a bare frame without any storybook UI
    await page.goto(
      `http://localhost:6006/iframe.html?args=&id=post-cheers--${id}&viewMode=story`,
    );

    // wait for the element to appear on-screen if necessary
    await page.waitForSelector('.cheers');

    // take a screenshot
    const res = await page.screenshot();

    try {
      // assert that it hasn't changed from the reference
      expect(res).toMatchImageSnapshot();
    } finally {
      await browser.close();
    }
  });
});
typescript
On the initial run, all the snapshots will be saved in a directory __image_snapshots__ alongside your components. Make sure to commit this!
To update the snapshots later if a component intentionally changes, re-run the tests you want to update with the
-uflag.
Keep it Tidy
All these images committed in the repo could become a burden, so I made a couple optimizations.
First, the snapshot sizes should be as small as possible. It doesn't require a 1900px wide browser to test a button, so I size each test canvas to match the component being tested.
Second, all the snapshots are stored in Git LFS instead of being committed as binary data. This means that the binary files are uploaded to a storage provider, while the repo has just pointers committed to it. You can read more about how GitHub handles Git LFS, which is what I use for hosting my objects.
Here's my .gitattributes file to get you started:
src/components/**/*/__image_snapshots__/*snap.png filter=lfs diff=lfs merge=lfs -texttextThe syntax is similar to .gitignore, but instead this tells Git to use LFS for any files matching the pattern.
Conclusion
Visual regression tests give me a lot of confidence that my components are working as expected, and that changes made by myself and others won't cause any issues. These tests can easily be run in CI and are pretty fast, so I run them on every pull request to make sure I can deploy with confidence, and also during development to spot-check my changes!
Do you deploy visual tests like this for your application or design system? I'd love to chat about it!